
DIRECT ANSWER
Direct answer
The key to converting an SU white model into a photorealistic design render is not simply writing a single style prompt. The process requires cleaning the model and locking the camera angle, aspect ratio, and structural reference first; then generating materials, lighting, soft furnishings, and atmosphere in separate rounds; and finally performing a structural check by overlaying the output against the white-model line drawing or original scene view. AI can support multiple rounds of iteration for schematic expression, but cannot guarantee zero structural deviation. Doors, windows, walls, fixed elements, scale, and perspective must each be verified by a human reviewer.
01 / APPLICABLE AUDIENCES
Which project stage is this workflow designed for?
This workflow is designed for the schematic design stage: you already have a SketchUp white model with clearly defined spatial relationships and a fixed camera angle, and you need to translate geometric massing quickly into material, lighting, and soft-furnishing expression. It serves direction exploration, internal design comparison, and client communication. It does not replace construction documents, material sample approval, lighting calculations, or on-site dimensional verification.
02 / BODY
Separate "looks realistic" and "structurally stable" into two distinct objectives
Photorealistic quality comes from material texture, lighting logic, reflections, soft-furnishing scale, and compositional depth. Structural stability, on the other hand, depends on camera position, silhouettes, depth cues, edges, and masks as conditioning inputs. When both objectives are pursued simultaneously in a single generation pass, doors, windows, ceiling planes, wall lines, or fixed furniture may be altered by the model in the course of visual optimization.
A more reliable approach is to assign distinct roles to each input: the white model supplies spatial facts; structural references constrain composition; text prompts and style references describe materials and atmosphere; and human review determines whether any output may advance to the next round. The original ControlNet paper demonstrated that edge, depth, and segmentation conditions can guide diffusion-based generation, but such conditioning does not constitute a guarantee of zero structural deviation.
References[4]
03 / STEPS
A seven-step workflow from SU white model to photorealistic design render
- Clean the white model: remove floating faces, overlapping faces, irrelevant components, and temporary construction lines; unify face normals; and confirm that walls, doors, windows, floor slabs, ceiling planes, and fixed furniture are spatially coherent.
- Lock the scene: save the camera position, field of view, perspective mode, and output aspect ratio. From this point forward, do not move the camera arbitrarily in pursuit of a better-looking image.
- Export structural references: from the same locked scene, export the white-model view, line drawing, or other usable edge and depth references, and retain the original scene screenshot as a verification baseline.
- Separate the expression variables: first establish the space type, primary materials, and lighting time-of-day; then iterate soft furnishings, decorative objects, color temperature, and details in separate rounds — do not change all conditions simultaneously in a single pass.
- Generate under controlled conditions: produce candidate images around the same structural reference; change only a small number of variables per round, and save all prompts, reference images, and version records.
- Overlay and verify structure: composite each candidate image semi-transparently over the white-model line drawing or original scene view, and check silhouettes, openings, structural members, scale, vanishing points, and fixed furniture item by item.
- Refine and deliver: continue refining material seams, edges, lighting, and soft furnishings only for directions that have passed the structural check; label all deliverables as "AI-assisted design renders" and note any items still to be confirmed.
04 / VISUAL
Structural study and photorealistic output within the same workflow
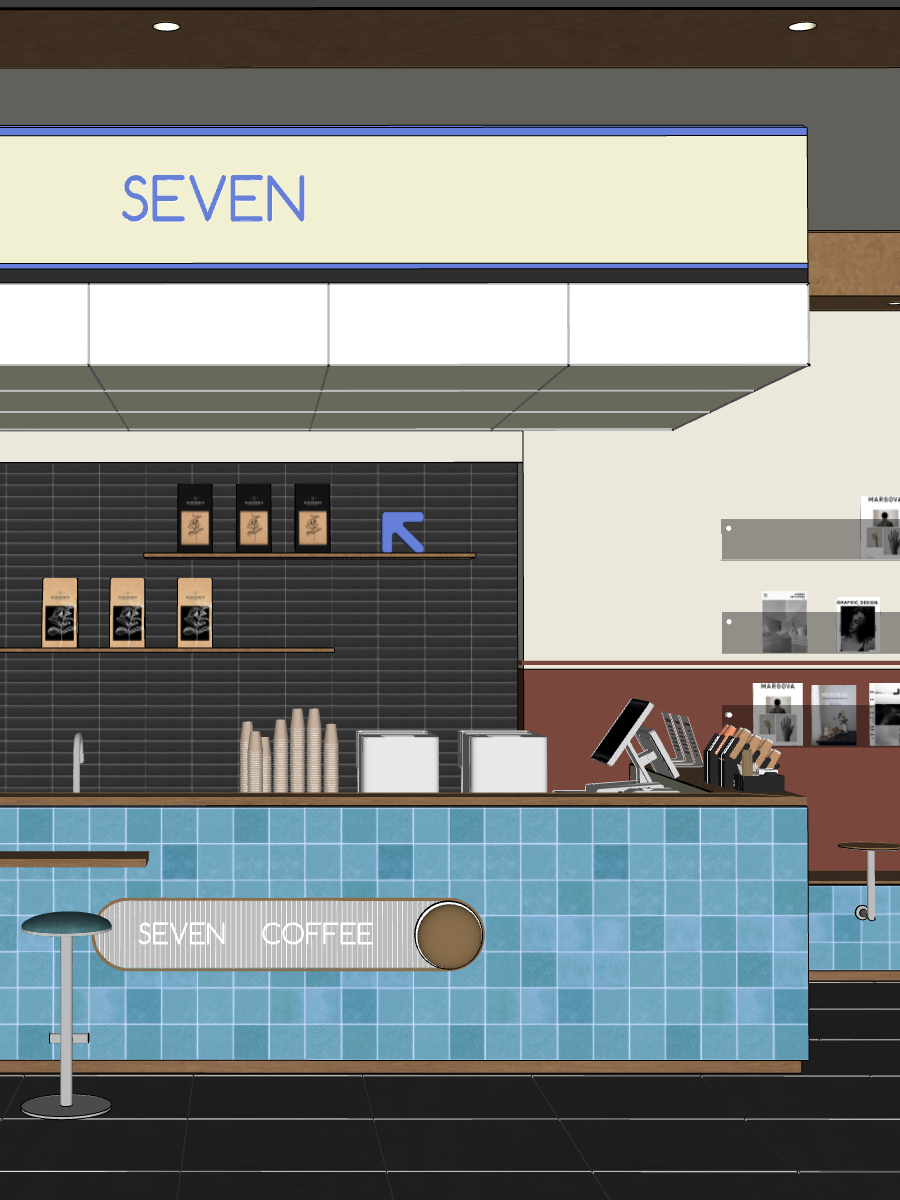
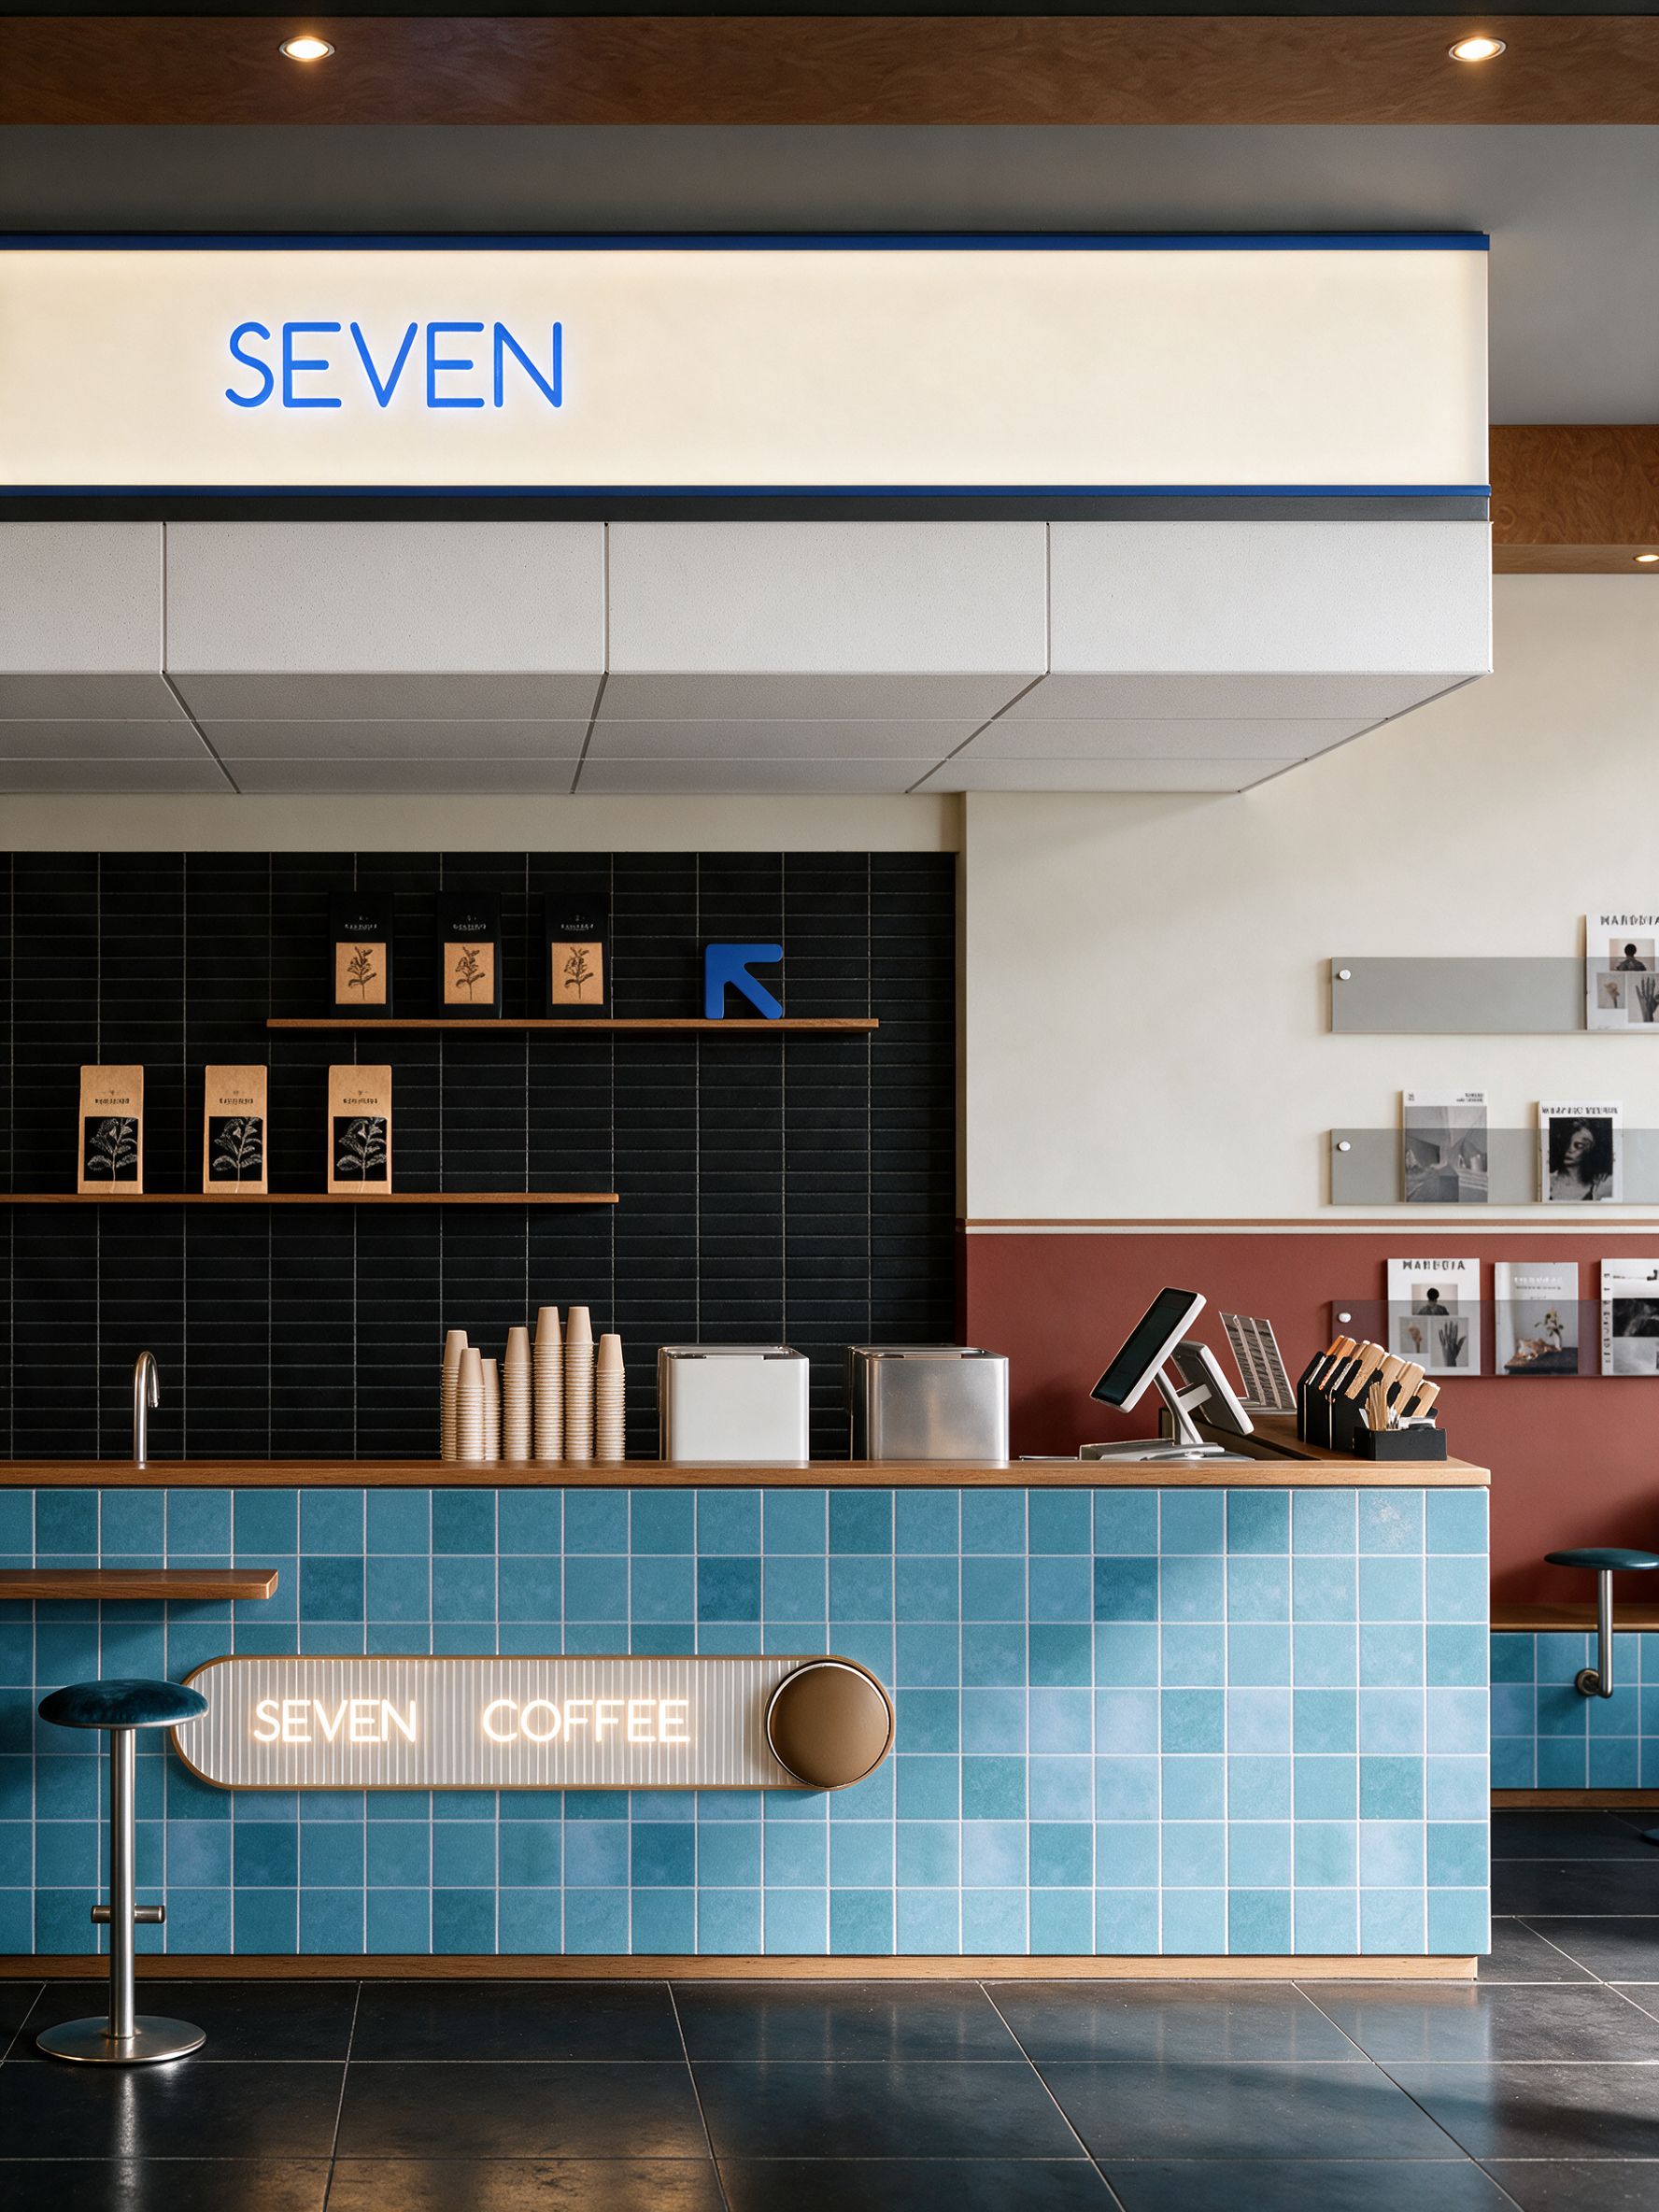
05 / COMPARISON
Structural verification checklist: do not rely solely on "looks about right"
- Camera and perspective: confirm that the horizon line, eye height, field of view, and principal vanishing points are consistent with the saved scene.
- Spatial silhouette: confirm that the boundary lines between walls, ceiling, and floor, as well as bay-width and depth relationships, have not changed.
- Doors, windows, and openings: confirm that the count, position, width-to-height ratio, sill height, and door-opening direction are consistent.
- Fixed elements: confirm that beams, columns, staircases, cabinetry, countertops, fireplaces, and equipment positions have not been deleted, relocated, or distorted.
- Scale relationships: confirm that furniture, light fixtures, human figures, and spatial volumes conform to accepted design norms, and that no occlusion has produced false structural readings.
- Material boundaries: confirm that the termination lines between different materials follow actual construction logic and have not been arbitrarily redrawn by the generative model.
06 / BODY
How to control materials, lighting, and style without repeatedly disrupting the structure
State the fixed conditions first, then the variable conditions. Fixed conditions include space function, camera, primary structural elements, doors, windows, and fixed furniture. Variable conditions include material combinations, soft-furnishing language, color temperature, weather, and visual mood. Opening only one group of variable conditions per round makes it far easier to identify which input caused any deviation.
SketchUp's official documentation states that AI Render uses a snapshot of the model's current viewport, and that changing the camera angle or viewport aspect ratio changes the input snapshot; preset prompts and user-supplied instructions are used to guide the visual direction. Accordingly, saving the scene and locking the aspect ratio are workflow controls that must be applied before generation begins and cannot be remedied after the fact.
When a tool supports edge, depth, or mask conditioning, treat those signals as constraints rather than structural guarantees. Conditioning strength that is too low may allow structural drift; conditioning strength that is too high may suppress material and lighting detail. The evaluation criterion in either case remains the structural difference revealed by the overlay comparison, not any fixed parameter value.
07 / BODY
Common failure modes and which step to roll back to
When doors, windows, or wall lines shift, do not attempt to continue generating using negative prompts alone. Roll back to the structural reference and check whether the line drawing is legible, whether the camera has moved, and whether masks cover the critical boundary edges.
When materials look good but the space is distorted, retain the material description, revert to a structurally verified base image, and regenerate. Do not continue applying localized patches on top of an image with incorrect structure.
When the structure is correct but materials and lighting appear unconvincing, first inspect material scale, roughness, light-source direction, and soft-furnishing layering before making targeted adjustments. Describing the desired result as a vague prompt such as "more realistic" is generally less effective than explicitly specifying surface material properties, lighting conditions, and lens characteristics.
When candidate images cannot be meaningfully compared with one another, it indicates that the variables were not controlled. Standardize the scene, aspect ratio, and structural reference, and compare only one element at a time — either materials, lighting, or soft furnishings.
08 / EXAMPLE
Organizing outputs into a reviewable design record
09 / BOUNDARIES
Delivery boundaries: photorealistic design renders are not real-world photographs or construction documents
- Images must be labeled as AI-generated or as AI-assisted design renders to prevent them from being mistaken for real-world photographs.
- Material textures, product specifications, colors, dimensions, pricing, and availability shown in generated images must be verified against actual samples and product documentation.
- Lighting as depicted in rendered images cannot substitute for illuminance calculations, glare analysis, electrical load design, or luminaire selection.
- Structural, fire-safety, MEP, accessibility, and construction-detail requirements must be confirmed through the appropriate professional documents and by the responsible parties.
- When confidential project data, personal information, or proprietary organizational knowledge is involved, confirm data access rights, permitted scope of use, and the tool's data-handling boundaries before proceeding.
References[5]
10 / TECHLAB
TechLab's role in this workflow
TechLab's publicly available product suite includes a cloud platform, a designer workbench, and an enterprise AI studio, all of which emphasize shared project context. This article recommends that teams continue to manage task inputs, structural references, candidate versions, material information, and review notes within their project workflow; the specific data objects involved are governed by the actual features of the respective products.
Teams may define scene naming conventions, input checklists, version control rules, review checklists, and delivery labeling requirements as internal working standards tailored to their project needs. These are methodological recommendations and do not represent a statement that these specific fields or handoff procedures are currently provided as publicly available product features. Actual features and availability are determined by the TechLab product page and live demonstrations.
View the TechLab product system →
References[6]
PRIMARY SOURCES
Sources and verification
These sources support specific facts and methodological boundaries. External sources do not represent a client or partnership relationship with SourceArk.
- [1] Using AI RenderSketchUp · 2026 · Accessed 2026-08-20
- [2] Saving and Sharing AI Render OutputSketchUp · 2026 · Accessed 2026-08-20
- [3] Preset PromptsSketchUp · 2026 · Accessed 2026-08-29
- [4] Adding Conditional Control to Text-to-Image Diffusion ModelsarXiv · 2023 · Accessed 2026-08-20
- [5] Artificial Intelligence Risk Management Framework: Generative Artificial Intelligence ProfileNational Institute of Standards and Technology · 2024 · Accessed 2026-08-20
- [6] SourceArk TechLab Product System重庆溯源方舟智能科技有限公司 · 2026 · Accessed 2026-08-20
FAQ / How to Quickly Convert an SU White Model into a Photorealistic Design Render: An AI Workflow Balancing Structural Control and Visual Quality
Frequently Asked Questions
Why must the camera angle be locked before converting an SU white model into a design render?
Because the generative tool perceives space as a projection determined by a specific camera and aspect ratio. Once the camera angle changes, silhouettes, vanishing points, and the overall composition change with it, making it impossible to determine afterward whether any difference stems from a deliberate design adjustment or from camera movement.
How can AI-generated design renders be kept as spatially consistent as possible?
Retain a fixed scene, a white-model image, and structural references such as line drawings or depth maps simultaneously; change only a small number of material and atmosphere variables per round; and verify each output by overlaying it against the original scene view. This approach reduces the risk of structural drift but cannot replace human structural verification.
How detailed does the white model need to be before starting?
The white model must at minimum represent all elements that affect composition and design judgment: walls, ceiling, floor, doors, windows, beams, columns, staircases, and fixed furniture. Decorative accessories may be added later, but critical openings, member thicknesses, and dimensional relationships must not be left ambiguous.
Can photorealistic design renders be handed directly to the construction team?
No. Photorealistic design renders are intended for schematic expression and communication. Materials, dimensions, construction details, lighting, equipment specifications, and construction requirements must still be confirmed through drawings, schedules, physical samples, and professional calculations.
If a door, window, or fixed cabinet is found to have shifted position or changed shape, what is the correct way to fix it?
Stop applying cosmetic corrections to the incorrect image. Return to a structurally verified reference, check the camera position, silhouettes, and masks, then regenerate. Localized retouching is appropriate only when the structure is already correct and the scope of the problem is clearly defined.